Old photos you dig out of a drawer usually have several problems stacked on top of each other: colors faded to a yellow-gray, scratches and creases across the surface, faces blurred into a smudge — and some are simply black and white. Restoring them used to mean either a trip to a photo studio, or hours in Photoshop painting on layers, masking, and color-grading. High effort, slow results.
There's a much simpler approach now: upload the whole photo and let AI handle scratch removal, detail recovery, and colorization in one pass. In about half a minute you get a clean image you can view and print.
This tutorial uses the image-to-image (edit) capability of GPT-Image-2 — no layers, no masks. For a sharper, print-ready result, set the resolution to 2K or 4K when you generate.
💡 Shortcut: click Restore an old photo to open image-to-image mode with the original aspect ratio and
2Kresolution preselected. Upload the photo to begin, or use one of the focused templates below.
Why use GPT-Image-2 for old photos
- It keeps "the same person": the biggest risk in photo restoration is making someone look like a stranger. GPT-Image-2 rebuilds detail along the original facial features, contours, and expression instead of inventing a new face;
- One-step, all-in-one: scratch removal, mold-spot cleanup, deblurring, and colorization can all go into a single prompt — no juggling separate tools;
- No photo-editing skills needed: no layers, brushes, or masks. If you can describe the result you want in words, you can do this.
Step 1 — Upload the old photo
Open https://image-2.net/ and drag the photo into the input box (or click to upload) to set it as the source image for this edit.
A few tips before uploading:
- Use a clean scan or re-shoot: scan it, or photograph it flat under even light — avoid glare and shadows;
- Crop out the album border first: if the photo has white edges or album marks, clean them up with the Image Cropper so the model focuses on the people and scene;
- One photo at a time: group shots are fine, but processing a single photo per run gives you the most control.
Step 2 — Write the restoration prompt (the all-in-one example)
A good restoration prompt comes down to three things: say what to fix + insist on preserving identity + ask for natural results, no beautification.
After uploading the source image, paste the prompt below and adjust as needed:
Restore this old photo with the following requirements:
- Remove surface scratches, creases, mold spots, stains, and noise;
- Repair and reconstruct blurred or missing facial and clothing detail, with clear, natural features;
- Correct yellowing, color casts, and fading so skin tones and ambient colors look true and natural;
- Improve overall sharpness and dynamic range while keeping a realistic film texture — no plastic look.

Important: keep every person's face, age, expression, hairstyle, and identity exactly the same.
Do not beautify, do not swap faces, do not change facial proportions. Restore only — do not re-create.
👉 Use this template: Remix the complete old-photo restoration prompt
Key points:
- Repeat "preserve identity, no beautification": this is the make-or-break of old-photo restoration. Without it, the model tends to smooth and "re-face" people into someone else;
- Set aspect ratio to "keep original": old photos rarely match standard ratios — don't let it crop to a square;
- Choose
2Kor higher: if you'll print later, the higher the resolution the better; - Click Generate and wait ~40 seconds for the restored image.

Step 3 — Tune the prompt for your scenario
The prompt above is the "fix everything" template. If your photo only has one type of problem, making that section more specific gives better results. Use the three variants below as-is.
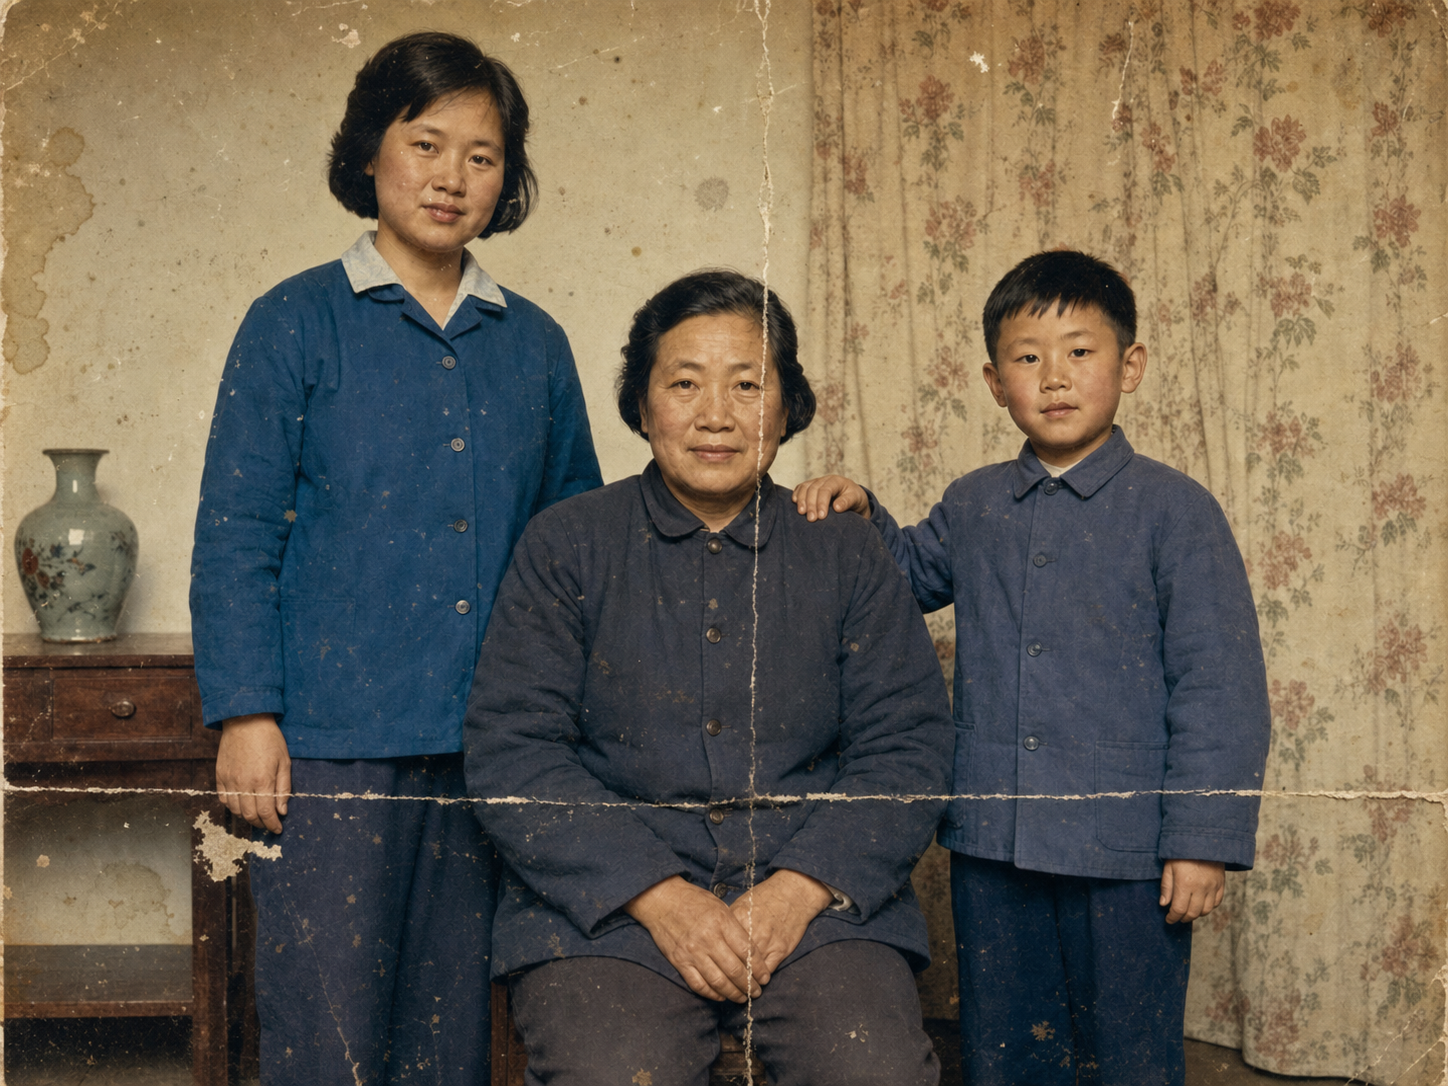
Scenario A: Colorize a black-and-white photo
The key to colorization is specifying natural, era-appropriate tones — otherwise you get neon colors and fake skin.
Naturally colorize this black-and-white photo:
- Realistic, healthy skin tones appropriate to the subject (adjust as needed);
- Clothing and background colors that fit the era of the photo — soft, not oversaturated;
- Also remove scratches and noise and improve sharpness;
- Keep faces and expressions exactly the same. No beautification, no face swapping.
👉 Use this template: Colorize a black-and-white old photo
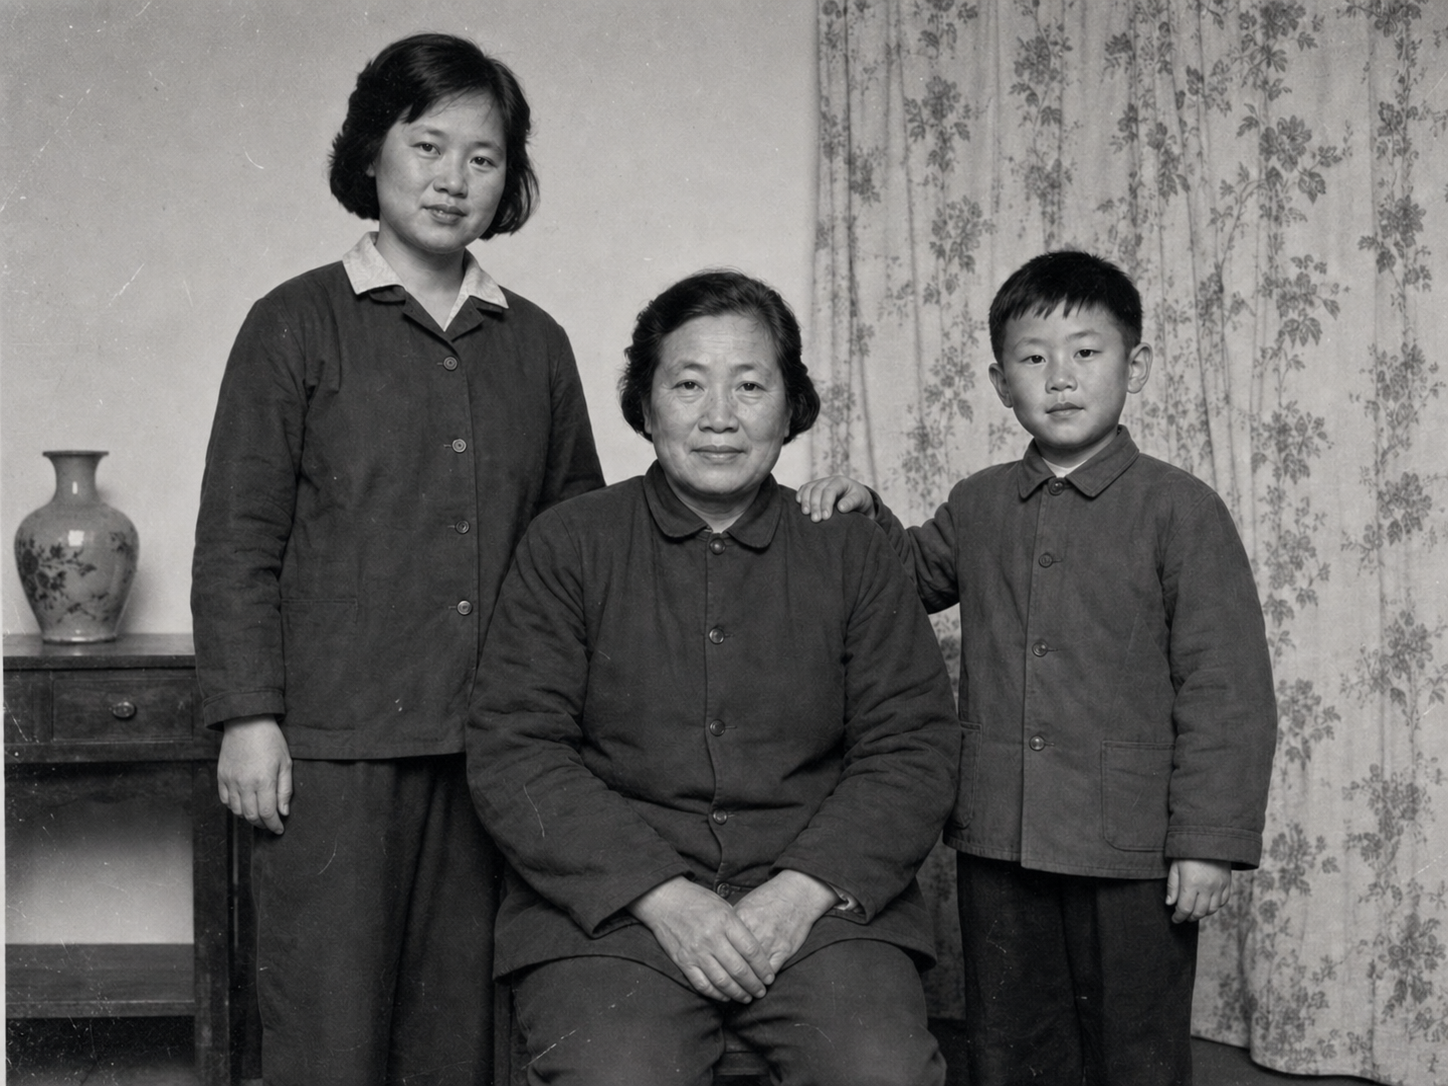
Before

After
Scenario B: Damage repair (scratches / creases / missing corners / mold)
For heavy damage, the focus is to explicitly tell the model to fill in plausibly from surrounding content.
Repair this damaged old photo:
- Fix tears, creases, missing corners, and large scratches, reconstructing missing areas plausibly from surrounding content;
- Remove mold spots, water stains, and yellow blemishes;
- Blend repaired areas seamlessly with surrounding texture, light, and shadow so the fixes are invisible;
- Keep identities and the original composition unchanged. Do not add people or objects that were not in the photo.
👉 Use this template: Repair a severely damaged old photo
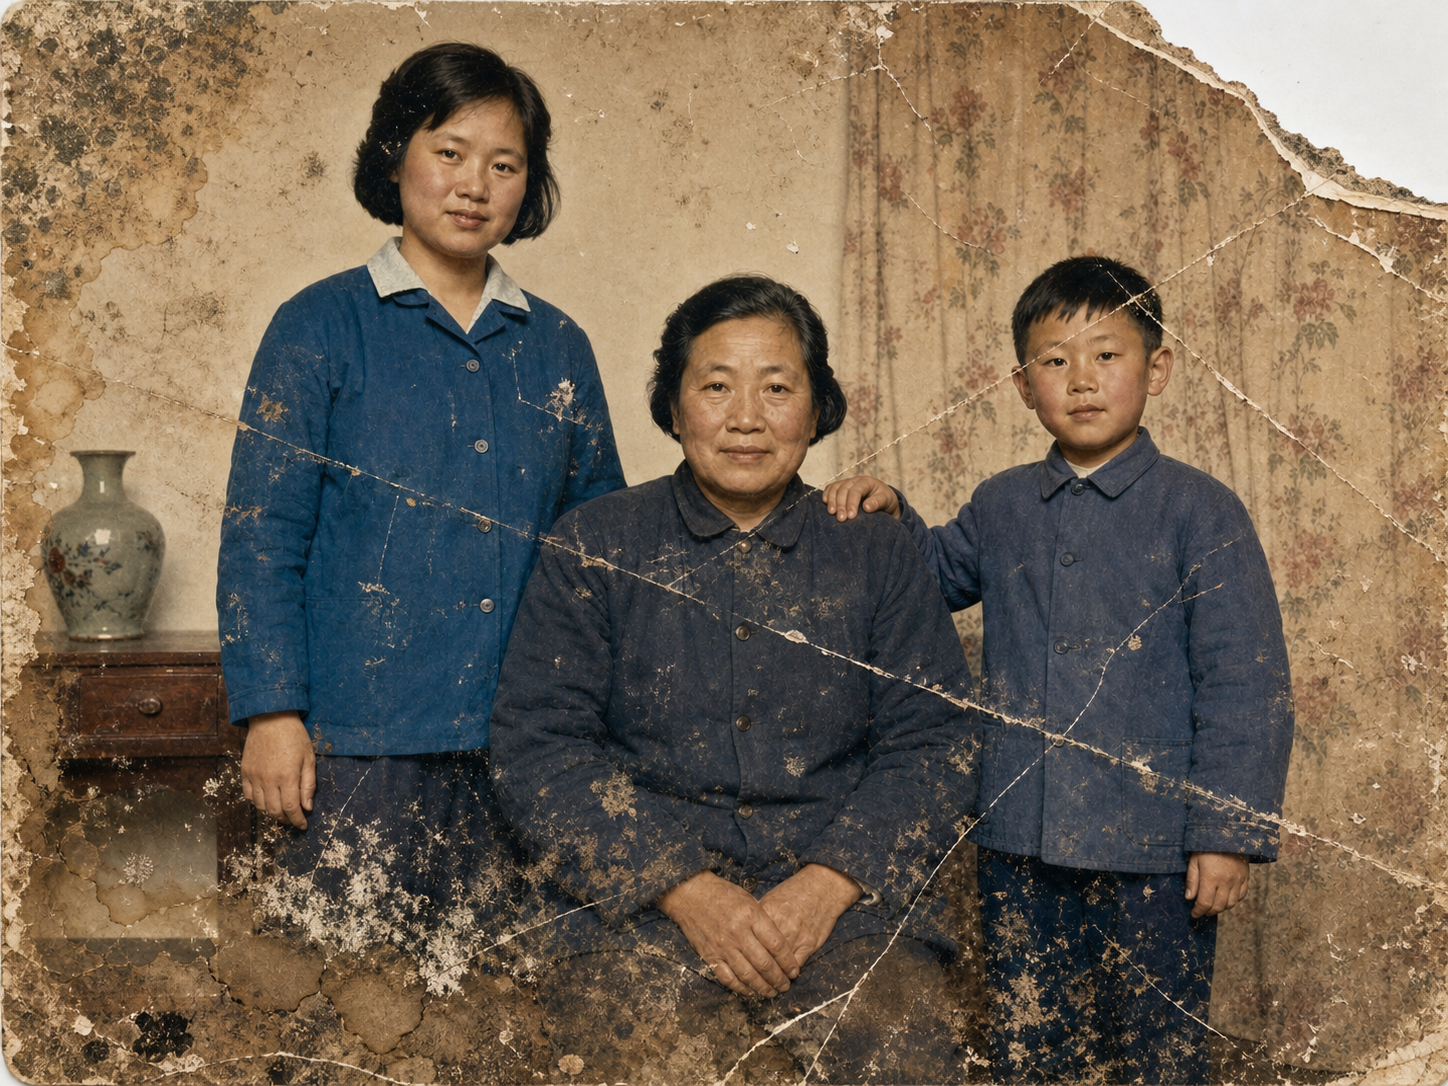
Before
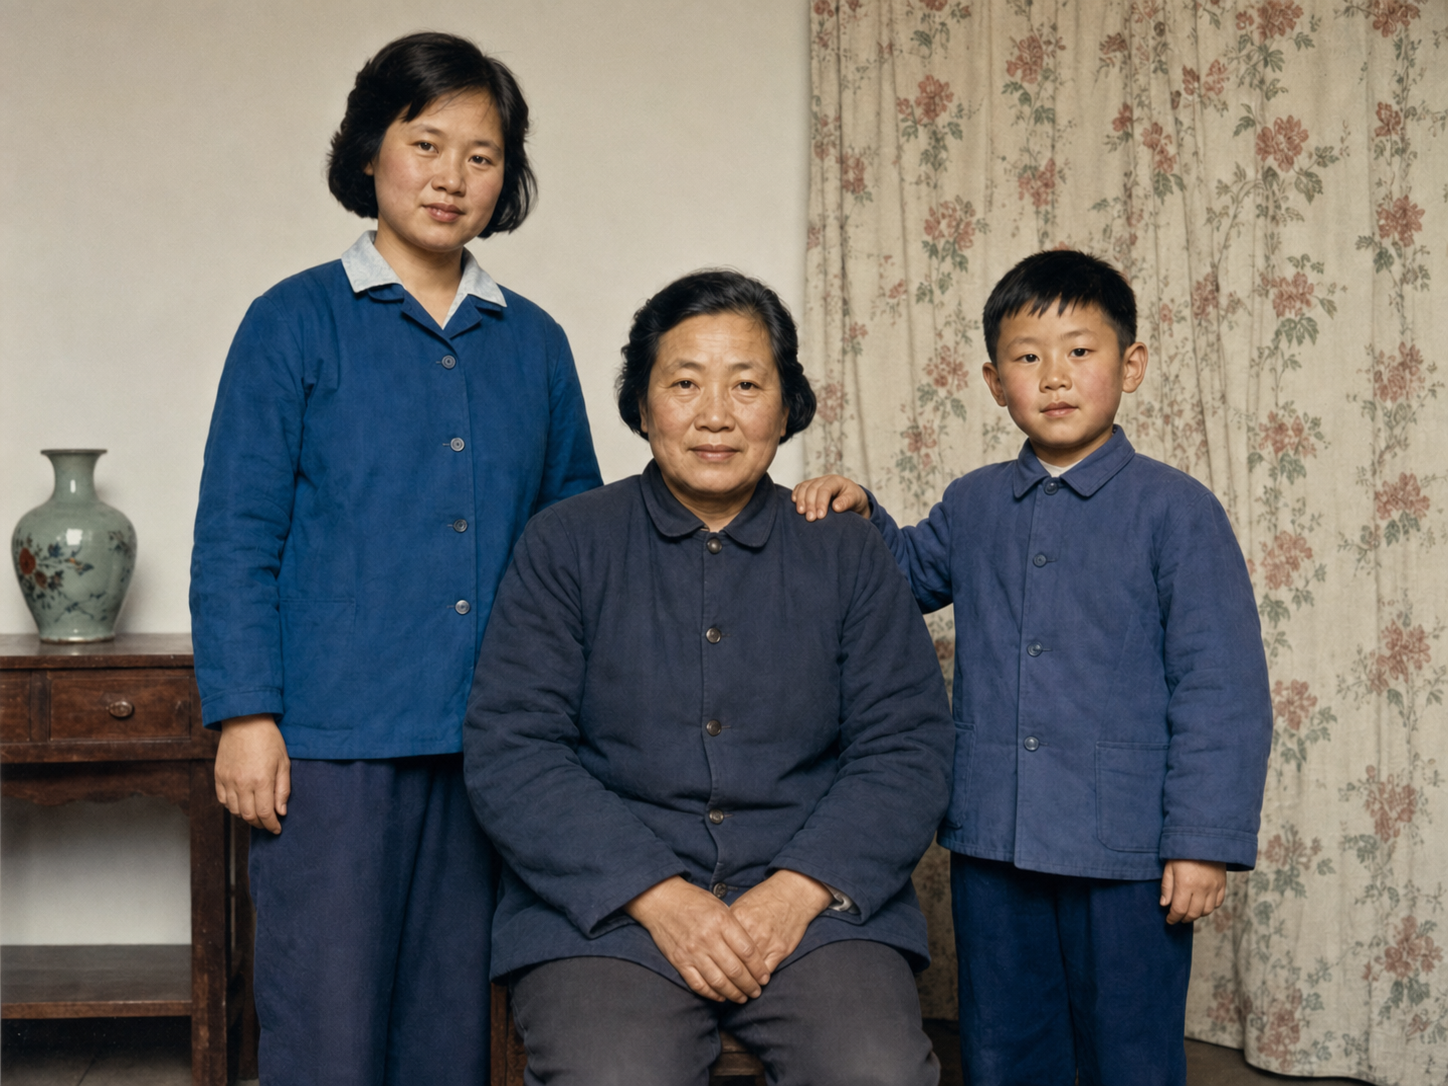
After
Scenario C: Deblur a low-resolution photo
A blurry old photo usually means lost facial detail. Call out "reconstruct facial detail" explicitly.
Restore this blurry, low-resolution old photo:
- Reconstruct clear, natural facial detail (eyes, eyebrows, lips, hair strands) and clothing texture;
- Remove blur, noise, and compression artifacts for a sharper, cleaner result;
- Keep faces, age, and expressions exactly the same — natural and realistic, no over-sharpening or beautification.
👉 Use this template: Enhance a blurry old photo
Before

After
Step 4 — Re-roll, or use "Continue editing" for local fixes
AI restoration takes a little luck: occasionally it changes something it shouldn't, or fills a region imperfectly.
- Not happy overall? Click Generate again with the same prompt to re-roll;
- Only a local problem (e.g. one person's face looks off)? Click Continue editing and add a targeted instruction, like: "Only redo the face of the man on the left to better match the original photo; keep everything else unchanged";
- Want a different stylistic direction (e.g. a warmer vintage tone)? Add that in Continue editing too.
Tip: with restoration, restraint wins. Asking for one clear change at a time is more reliable than piling on requests.
Pro tip: generate at 2K / 4K for a sharper result
If the restored photo is headed for printing, a frame, or sending to relatives to print, higher resolution is better.
When you generate (or in Continue editing), set the resolution to 2K, or 4K for larger prints, then generate again. Higher resolution preserves more facial detail and texture, so enlarging for print is far less likely to look soft.
Note: higher resolution takes a little longer to generate, but it's well worth it for photos you plan to print.
Wrap-up
Restoring an old photo really comes down to two things:
- On image-2.net, upload the whole photo and let GPT-Image-2 restore it in one step with a "de-damage + recover detail + colorize + preserve identity" prompt;
- If you're printing, set the resolution to 2K or 4K for a sharper result.
Save the prompt template and just change the specific issues to fix — the next photo costs almost nothing. A few directions worth trying:
- Digitize a family album: restore and colorize the whole album photo by photo into a digital album;
- Restore portraits of loved ones: sharpen blurry old ID photos for keepsakes;
- Holiday gifts: restore and print a photo of your parents or grandparents when they were young, framed as a present.
One caveat: AI restoration inherently repaints some detail, so the restored face is "very close" — not a 100% reproduction. For important historical photos, always keep the original scan and treat the restored version as a nicer-looking copy.