Xiaohongshu (Little Red Book) loves multi-image grid posts — a single composition sliced into multiple tiles, uploaded as a carousel. Beyond looking polished, a grid post also takes up more real estate in the feed.
This tutorial walks through a zero-friction approach: use GPT-Image-2 to generate a single composite image, then run it through the bundled Image Splitter tool, which auto-detects the black grid lines and slices the image into individual tiles you can upload one by one.
Using a coffee-roasting example, the end-to-end flow takes about a minute.
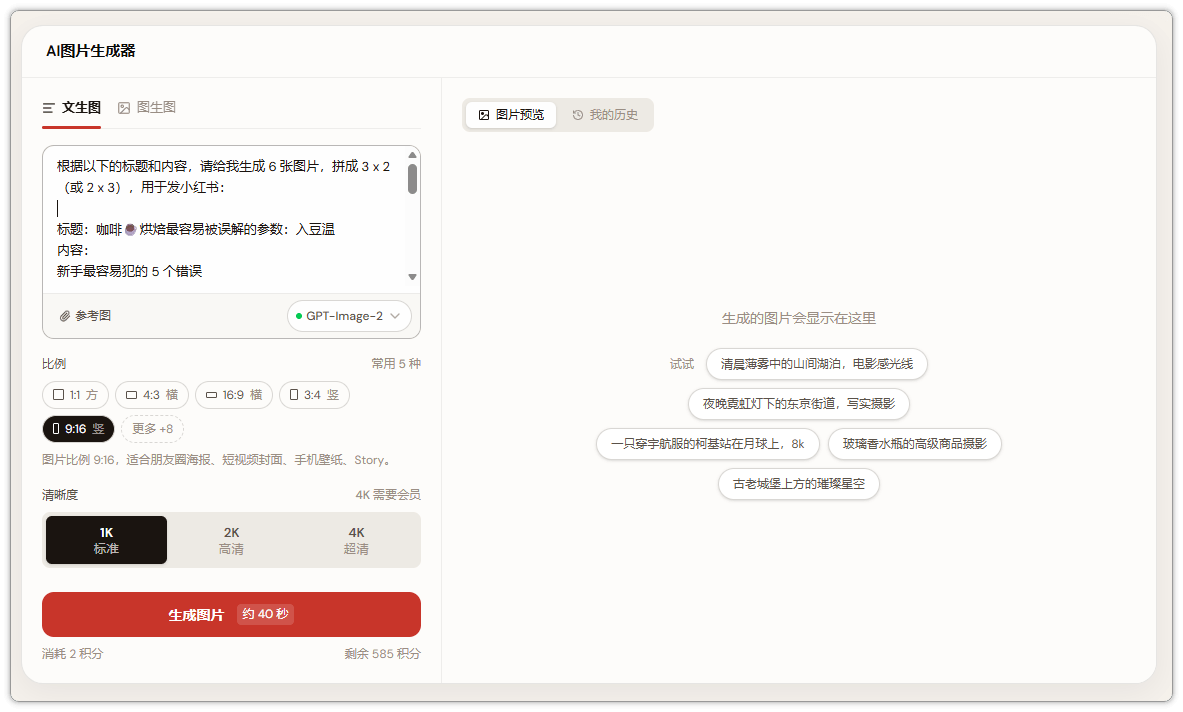
Step 1 — Write the prompt and generate the collage
💡 Shortcut: don't want to copy the prompt and set every option manually? Click Remix this prompt to prefill the prompt,
9:16aspect ratio, and2Kresolution. Change the title and content, or keep reading to understand the prompt structure.
Open https://image-2.net/ and paste the following prompt:
Based on the title and content below, generate 6 images of equal width and height, arranged as a 3x2 grid (using pure black dividers), for a Xiaohongshu post:
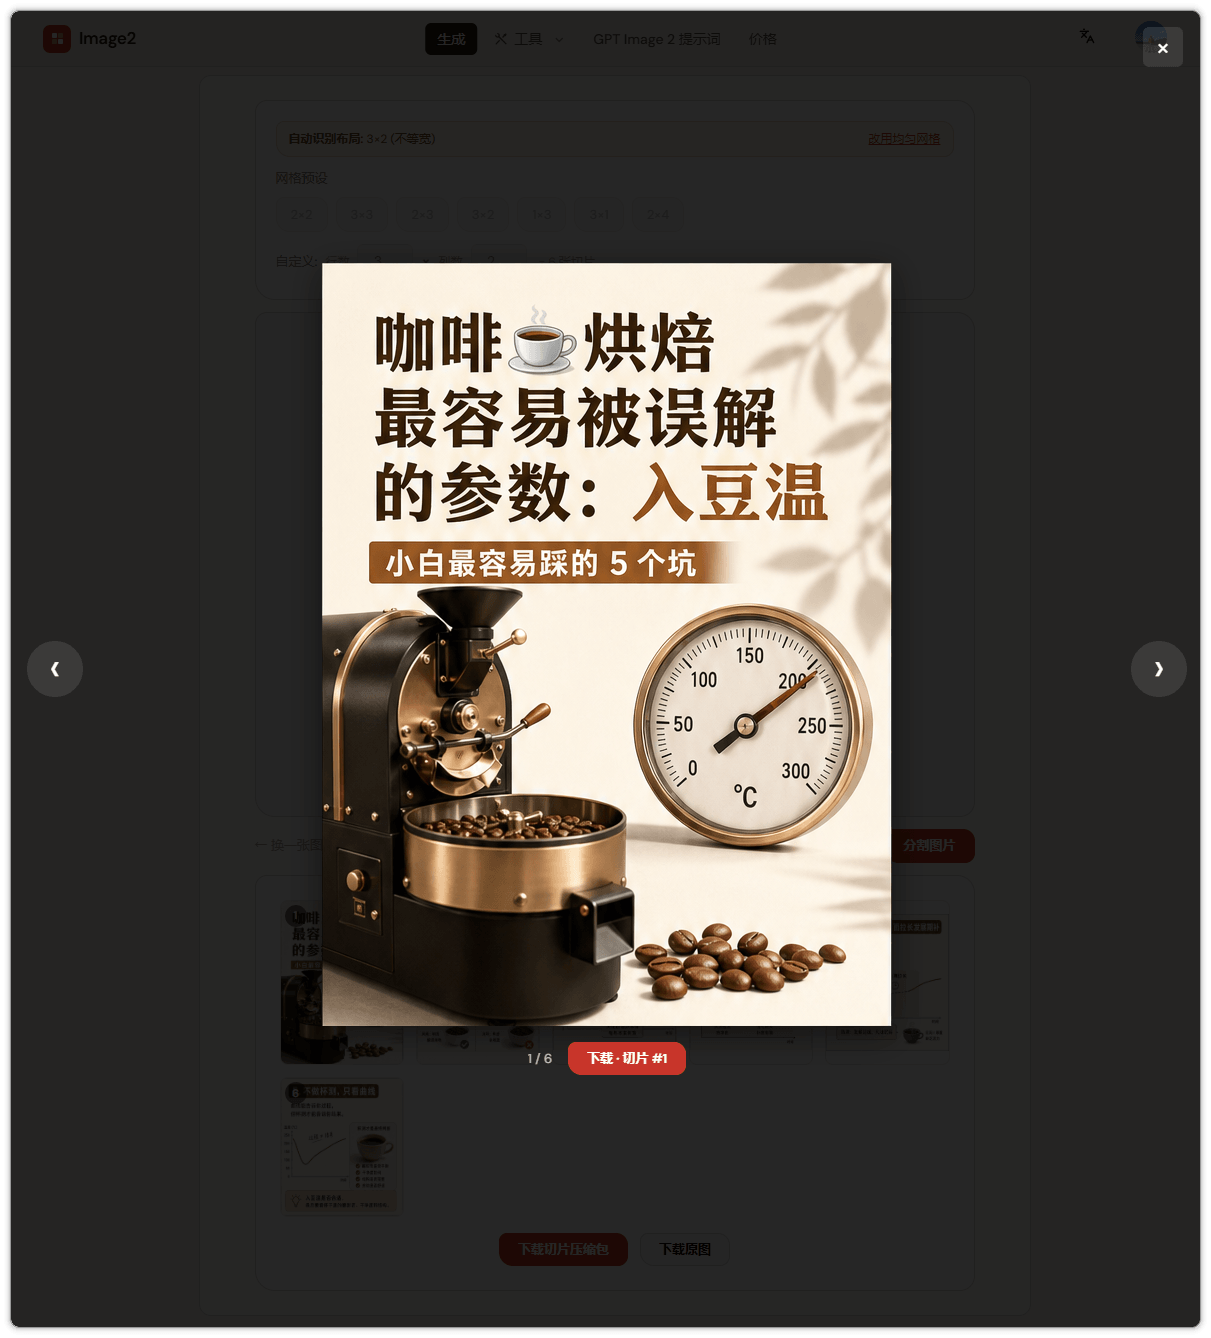
Title: The most misunderstood parameter in coffee roasting: charge temperature
Content:
The 5 most common mistakes beginners make:
1. Copying someone else's charge temperature
Their 200°C is not your 200°C. The machine, batch size, probe, and preheat are all different.
2. Only watching the turning point
The turning point is feedback, not a target. Don't blindly raise or lower charge temp just to chase a specific turning time.
3. Charge too hot, then trying to "rescue" by cutting gas later
Heat adjustments have lag. The early thermal shock has already happened; you may not be able to fully recover.
4. Charge too cold, then trying to "make up" with a longer development phase
The drag from a slow first phase often can't be solved by development. Many times, the longer you drag, the duller it gets.
5. Reading curves but skipping cupping
Curves tell you the process, but the cup tells you the result. Whether charge temp was right comes down to acidity, sweetness, bitterness, cleanliness, and structure in the cup.A few key settings:
- Aspect ratio: pick
9:16, matching Xiaohongshu's portrait layout; - Resolution: pick
2K— after slicing, each individual tile is still sharp; - Click Generate and wait ~40 seconds for the full collage.
Two quick prompt tips:
- State the grid explicitly, e.g. "3x2" or "3x3" — otherwise the model may freestyle the layout;
- Ask for pure black dividers — this makes auto-detection in the next step much more reliable.
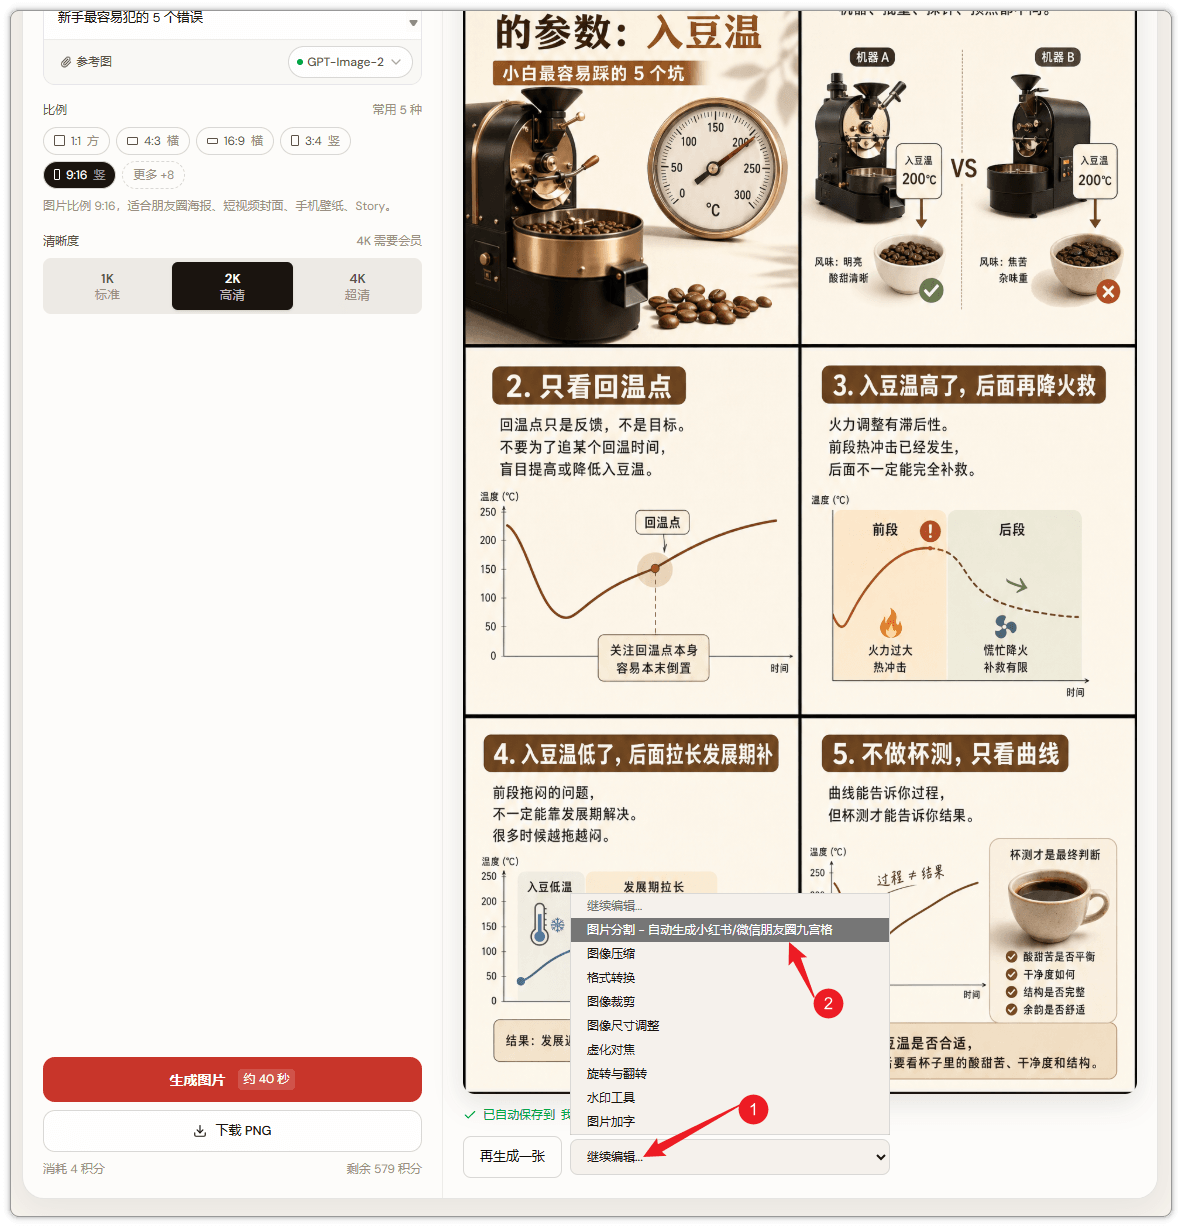
Step 2 — Reroll if needed, then click "Continue → Image Splitter"
GPT-Image-2 is a bit non-deterministic. Text can be slightly off, or the layout may not be quite right.
- Not happy? Click Regenerate to reroll with the same prompt;
- Happy with it? Click Continue and pick Image Splitter from the menu.
You'll be redirected to the splitter with the generated image URL passed as a query param, something like:
https://image-2.net/tools/image-splitter/?imageUrl=https%3A%2F%2Fstatic.image-2.net%2Fuploads%2Fopenrouter%2Fimage%2F59d82895-c21f-4da3-b74a-24c8f013c57d.pngSo you skip the manual download-and-reupload step.
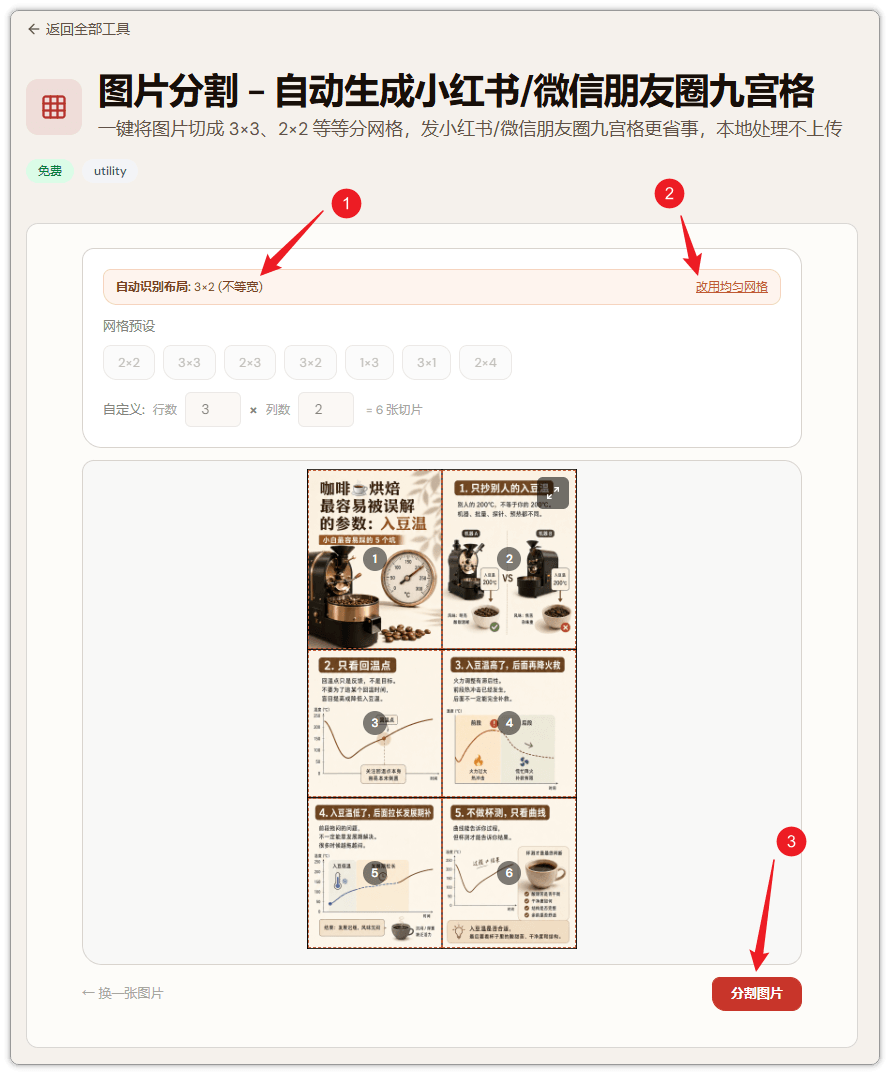
Step 3 — Wait for auto layout detection, then "Split Image"
Once on the splitter page, the tool fetches the image. Depending on your network, it usually loads within a few seconds.
After loading, it automatically detects the black dividers and infers the grid layout (3 columns × 2 rows). You'll see a preview frame on each cell.
- The default mode is Smart Layout Detection, which is the most accurate for collages with black lines;
- If your image is a clean uniform grid, you can switch to Uniform Grid and set rows/columns manually;
- Advanced settings let you tweak spacing and border for cases where the outer margins aren't symmetric.
When the layout looks right, click Split Image.
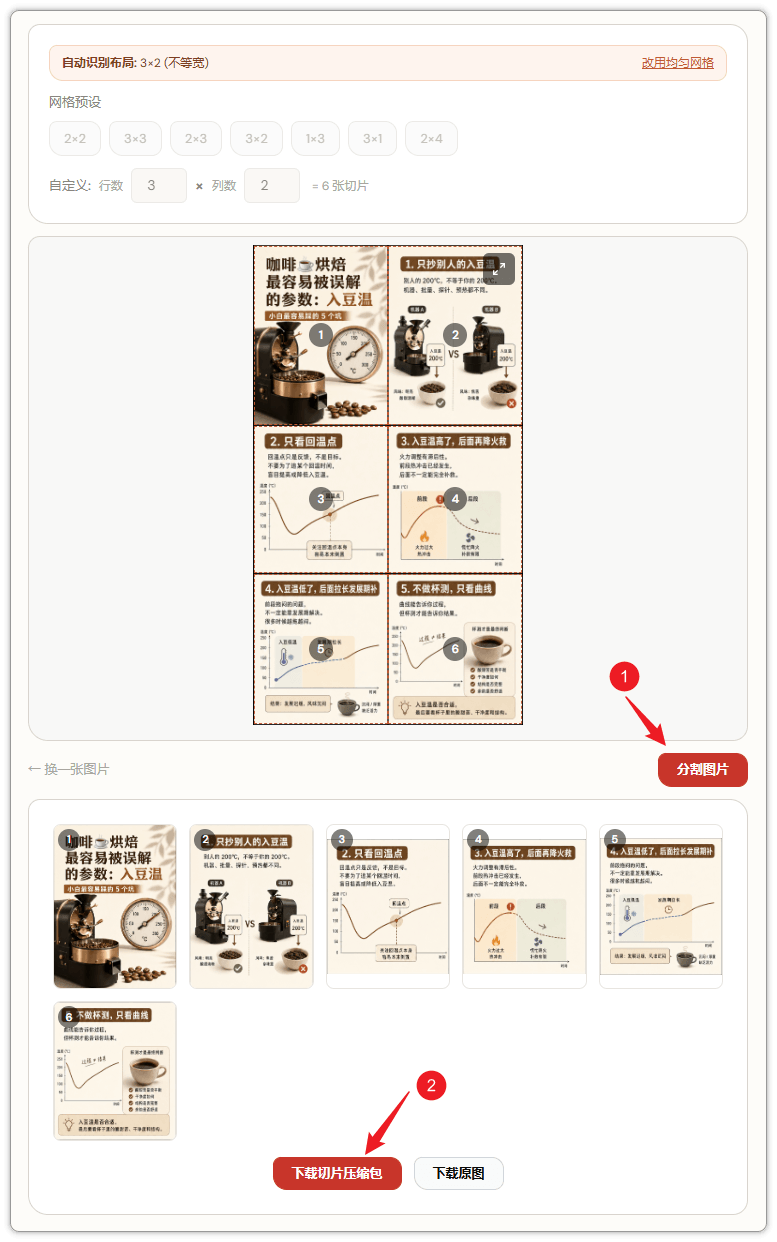
Step 4 — Split, then download the tile bundle
This step is near-instant. After clicking Split Image, you'll see all the tiles listed below.
Two download options:
- Click Download Tiles (ZIP) to grab everything in one archive, numbered in order — easy to batch upload to Xiaohongshu;
- Or click any individual tile to download just that one.
All tiles share the same dimensions (square, equal width and height), so the 6- or 9-grid layout snaps together correctly once uploaded.
Step 5 — Preview individual tiles to verify
Want to inspect a tile before downloading? Click it to open a fullscreen preview.
In preview mode you can clearly check:
- Whether any text or layout was clipped;
- Whether the margins are symmetric;
- Color and sharpness.
If a single tile looks off, go back to Step 3 and adjust the layout settings, then split again. If the whole composition is off, go back to Step 1 and reroll.
Wrap-up
The whole flow boils down to three things:
- Use a structured prompt on image-2.net to make GPT-Image-2 generate a collage with black dividers;
- Hand it off to the Image Splitter to auto-detect the grid and slice tiles;
- Download the ZIP and upload to Xiaohongshu.
It's not just for coffee content. The same workflow fits:
- Reading notes / takeaway lists (cover + 5 key points);
- Course outlines / tutorial covers (cover + content pages);
- Restaurant or travel guides (cover + multiple spots);
- Fitness meals / recipes (cover + step-by-step photos).
Save the prompt as a template and only swap out the title and content each time — your per-post production cost drops dramatically.